


Instructions for Buying Tokens
Connecting wallet
To purchase tokens, you need to connect the Web 3 wallet you are using (for example, MetaMask, Trust Wallet, Core.app or another):
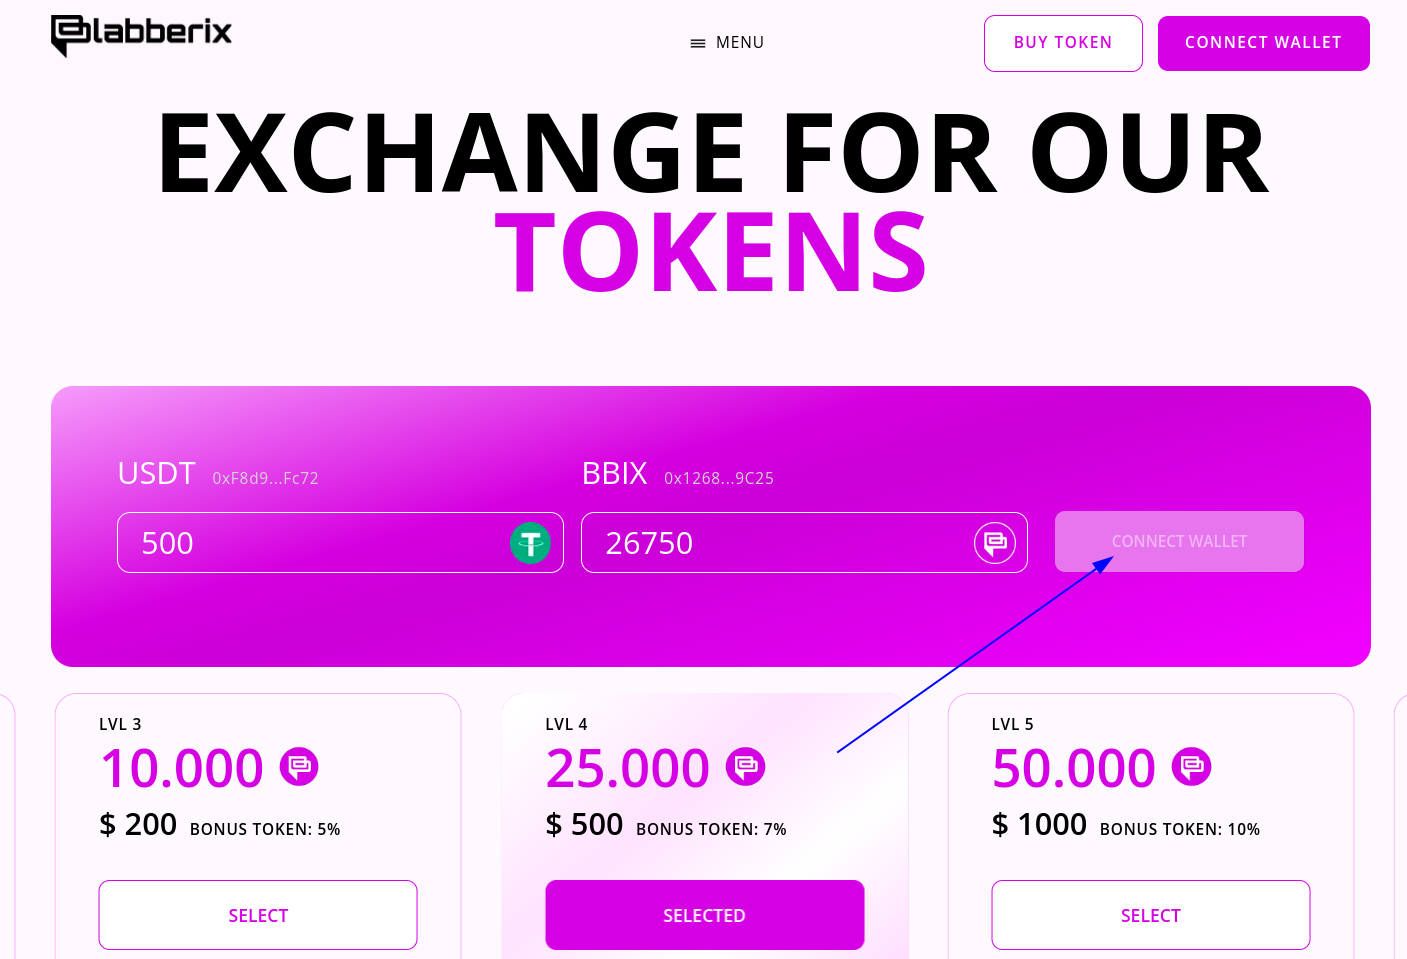
Fig. 1
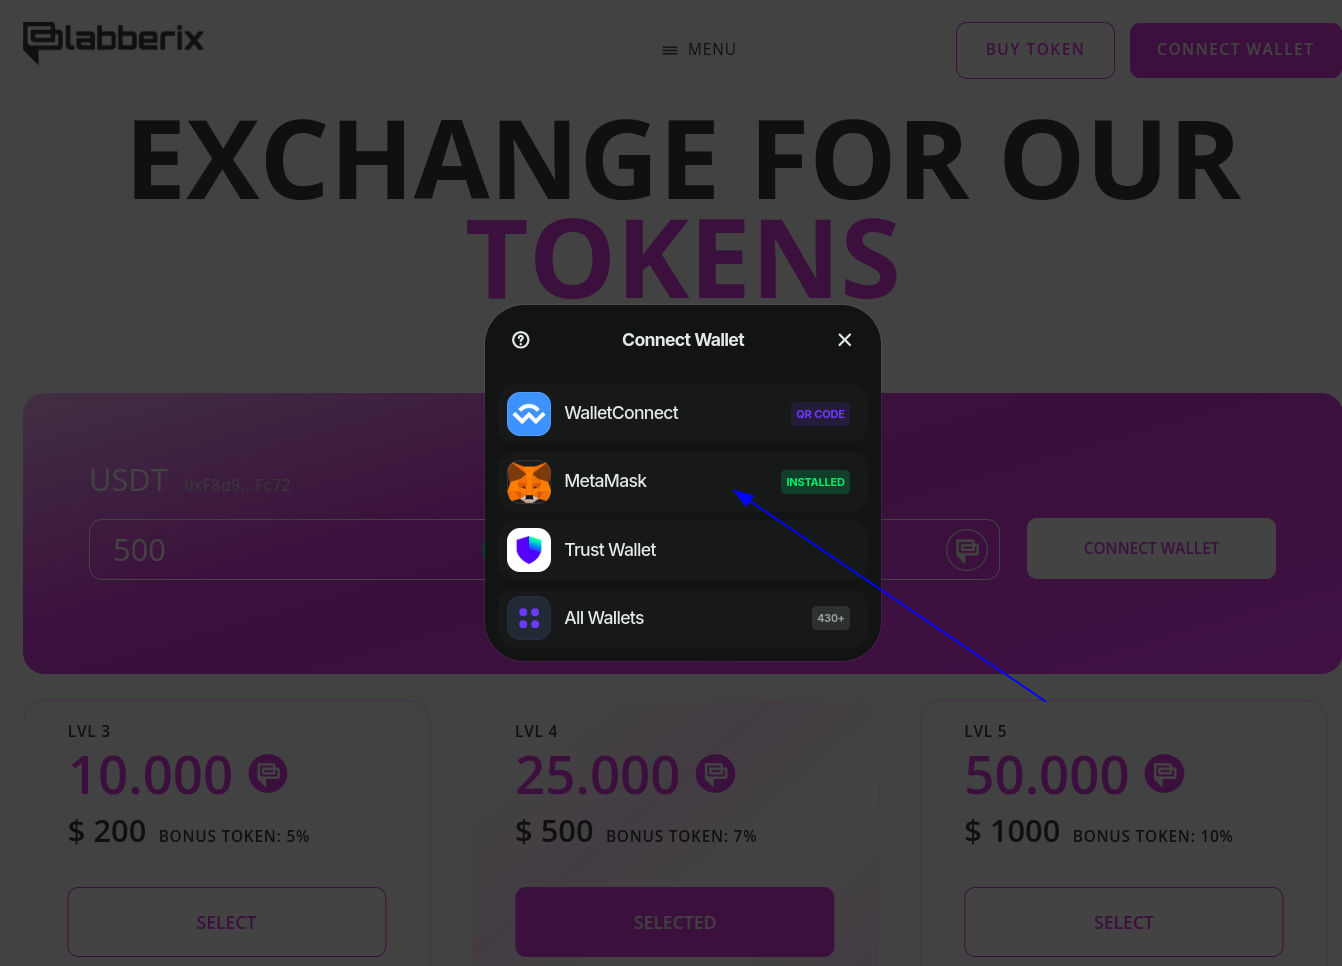
Fig. 2
Select the account you want to make a purchase from and confirm your choice:
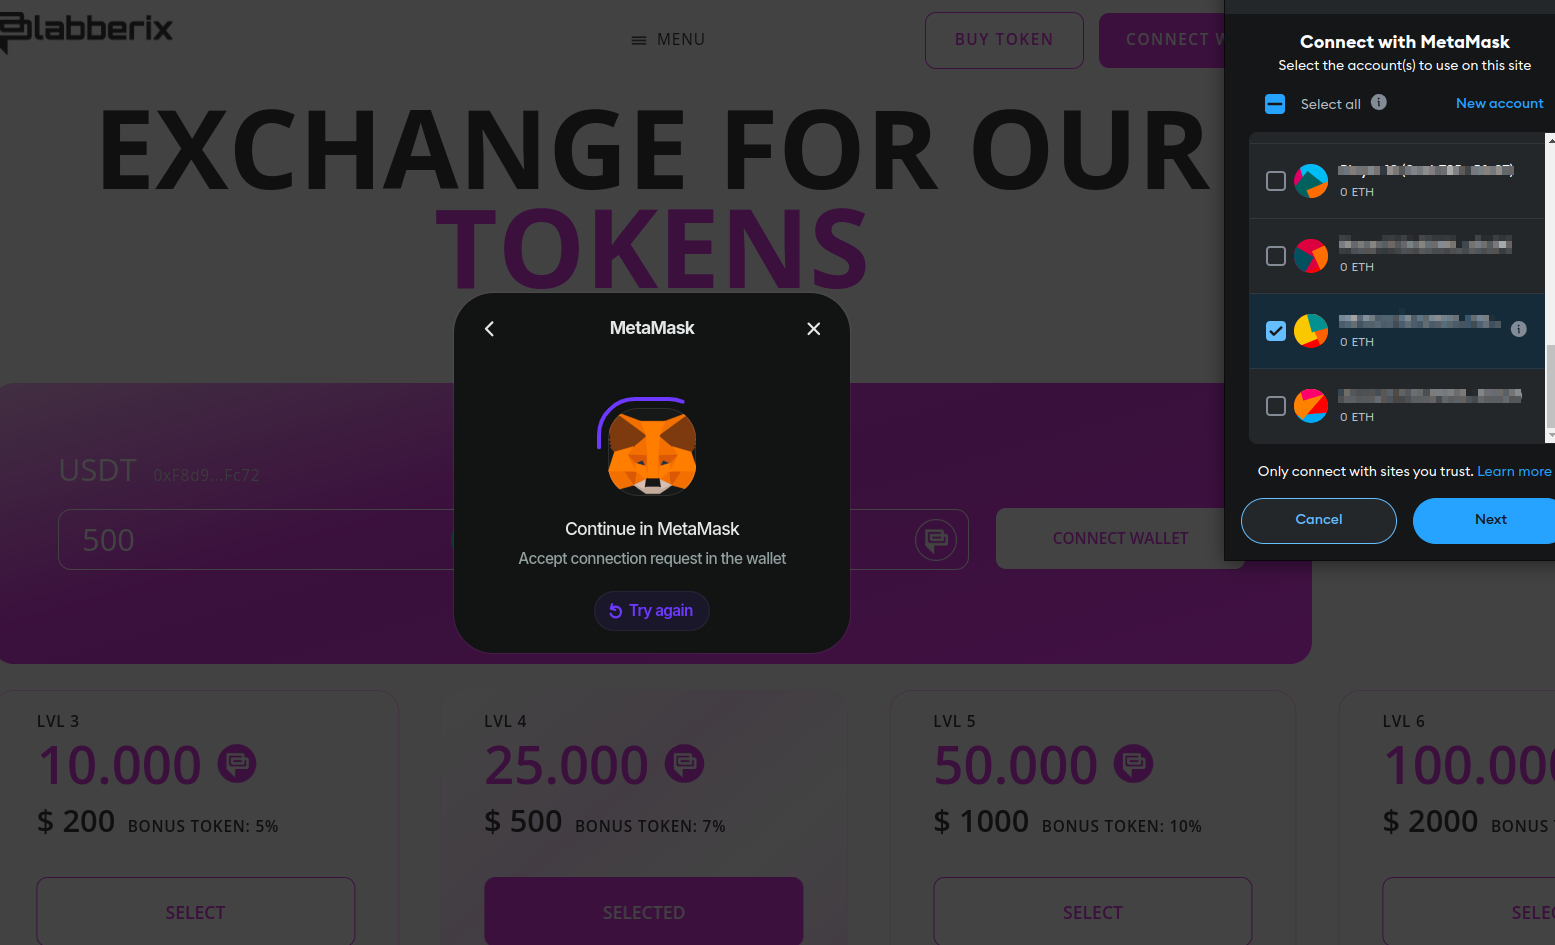
Fig. 3
Confirm permission to see address, account balance, activity and suggest transactions to approve:
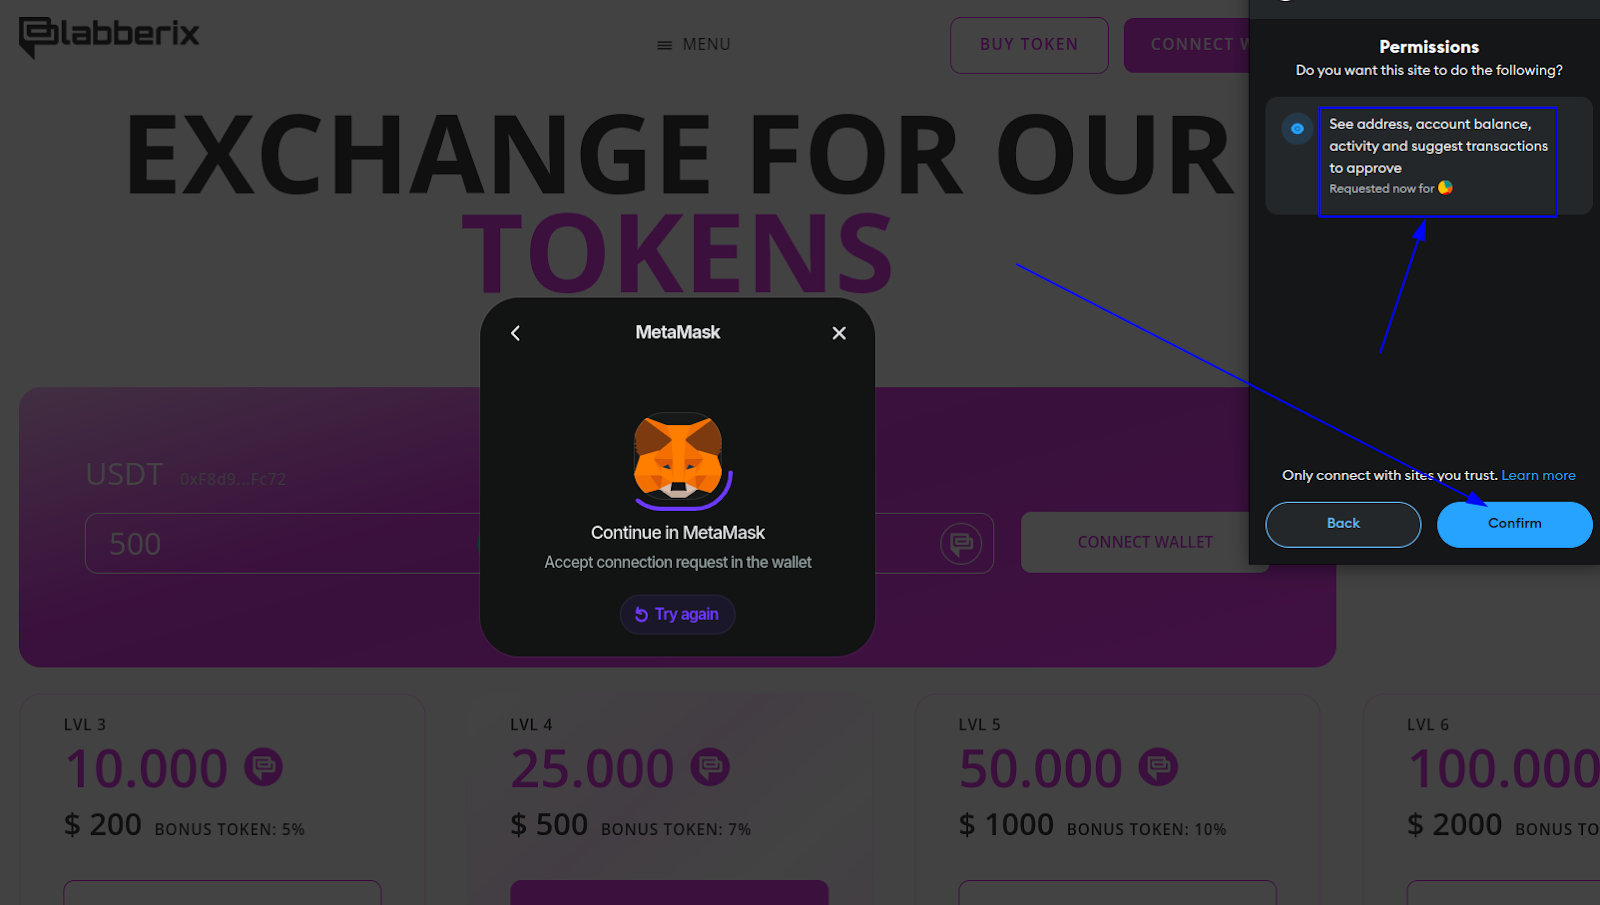
Fig. 4
If your wallet is not connected to the Avalanche (C-chain) network, then confirm the network switch to this network:
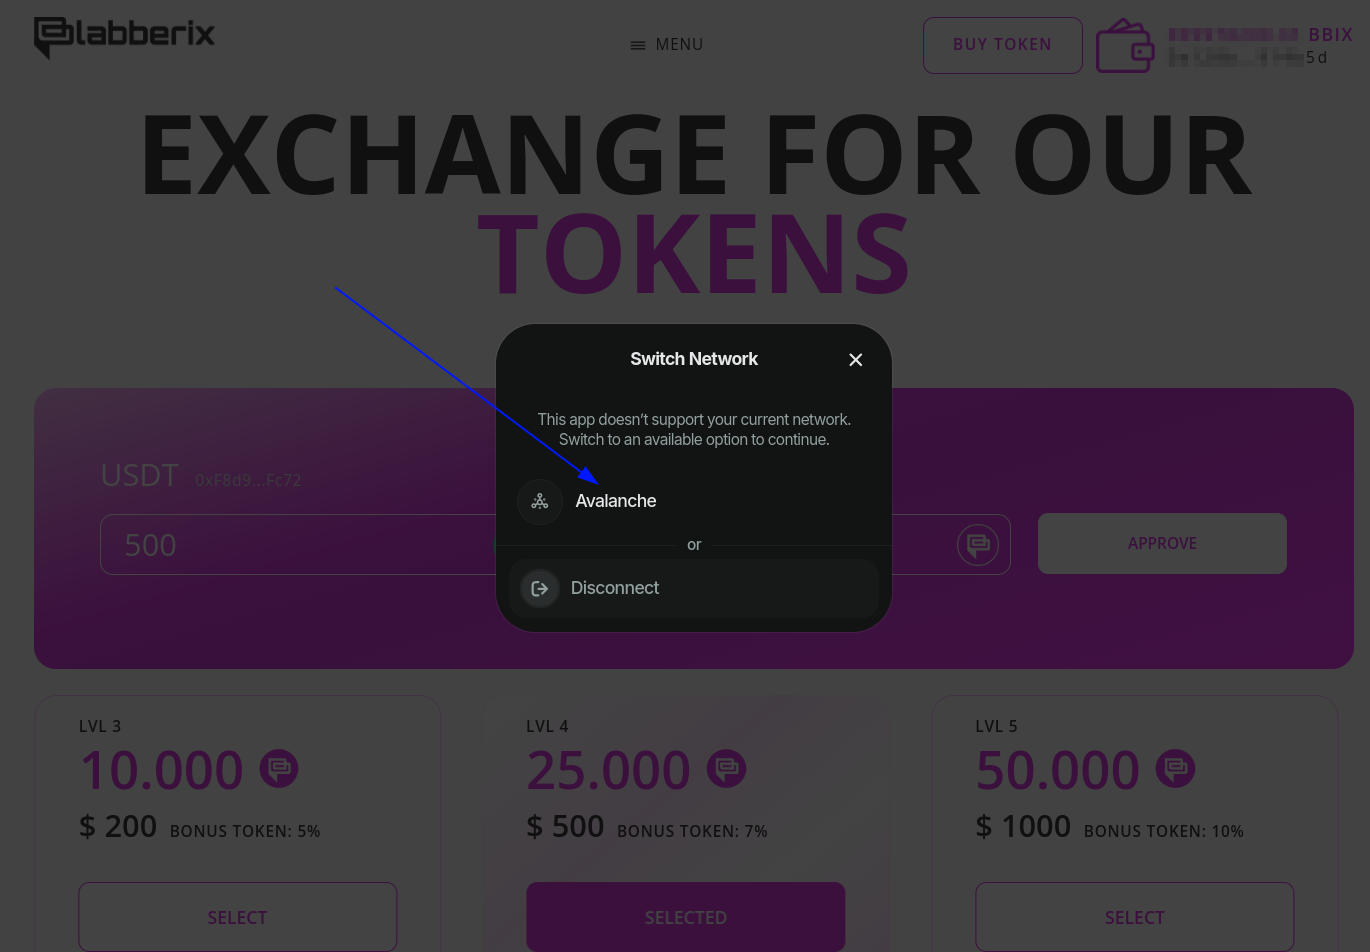
Fig. 5
After that, you need to confirm permission to debit the amount you wish to use for purchasing tokens from your wallet:
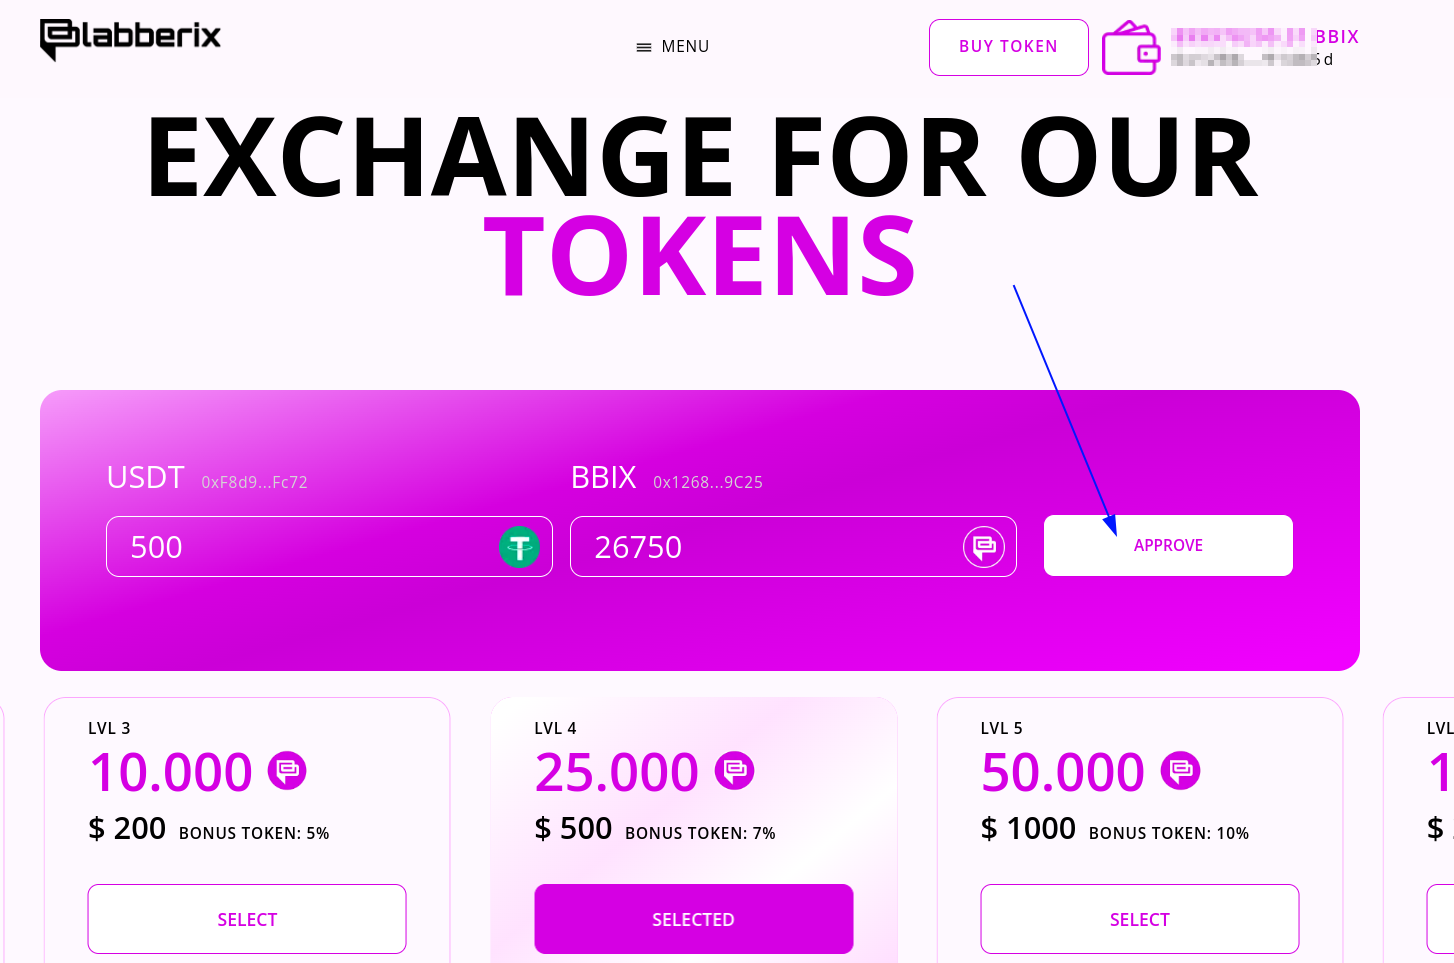
Fig. 6
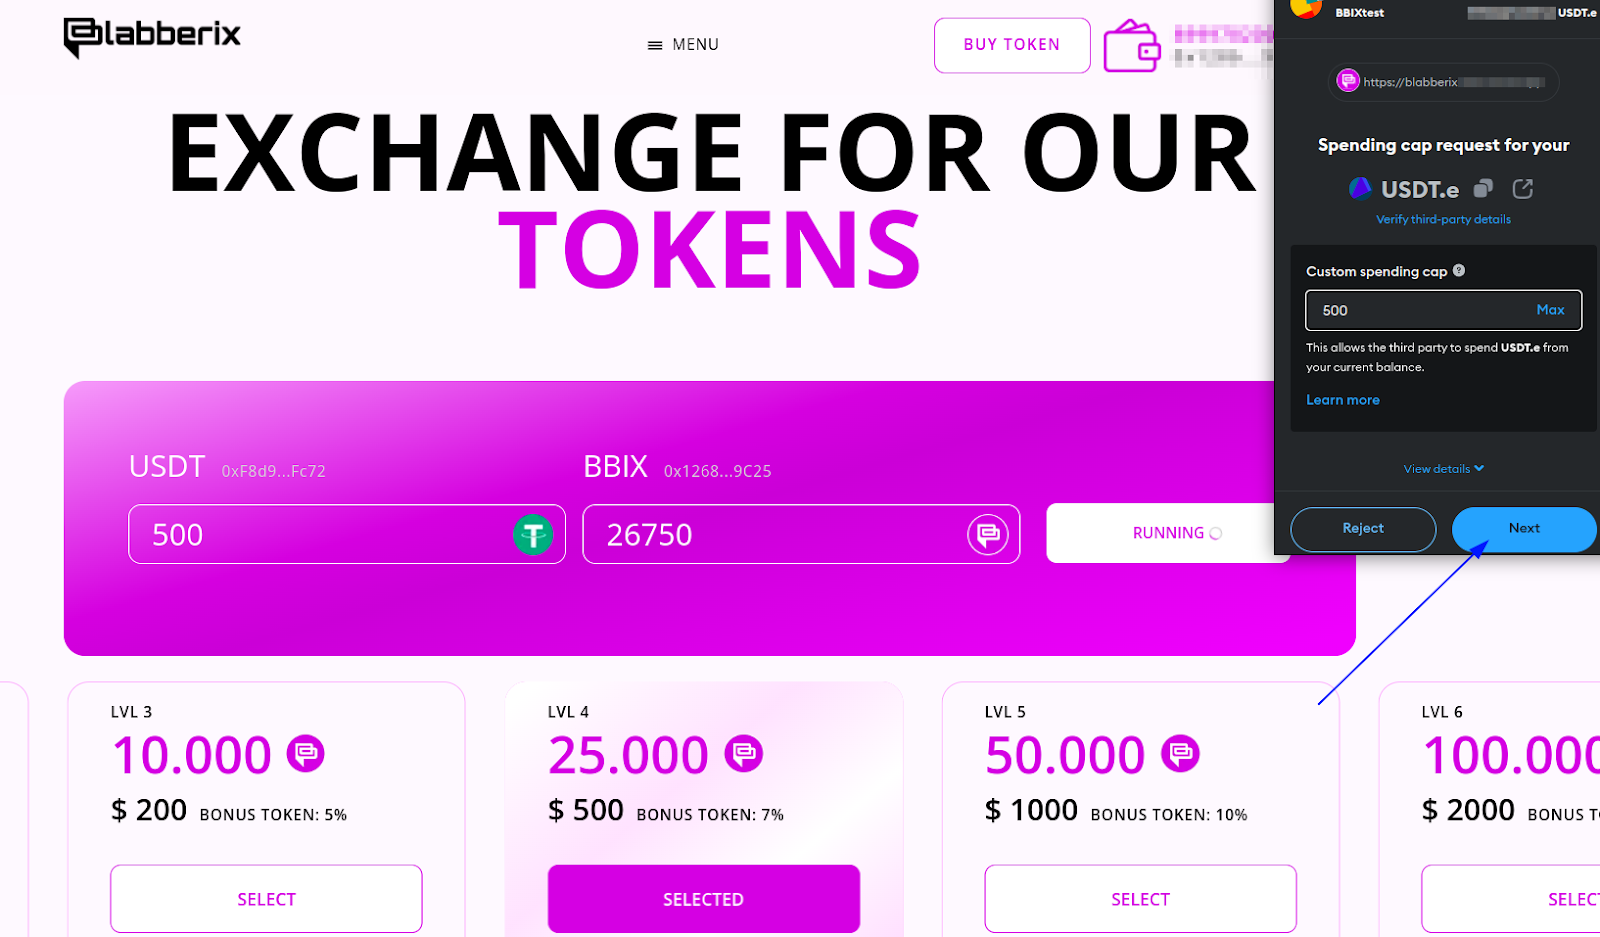
Fig. 7
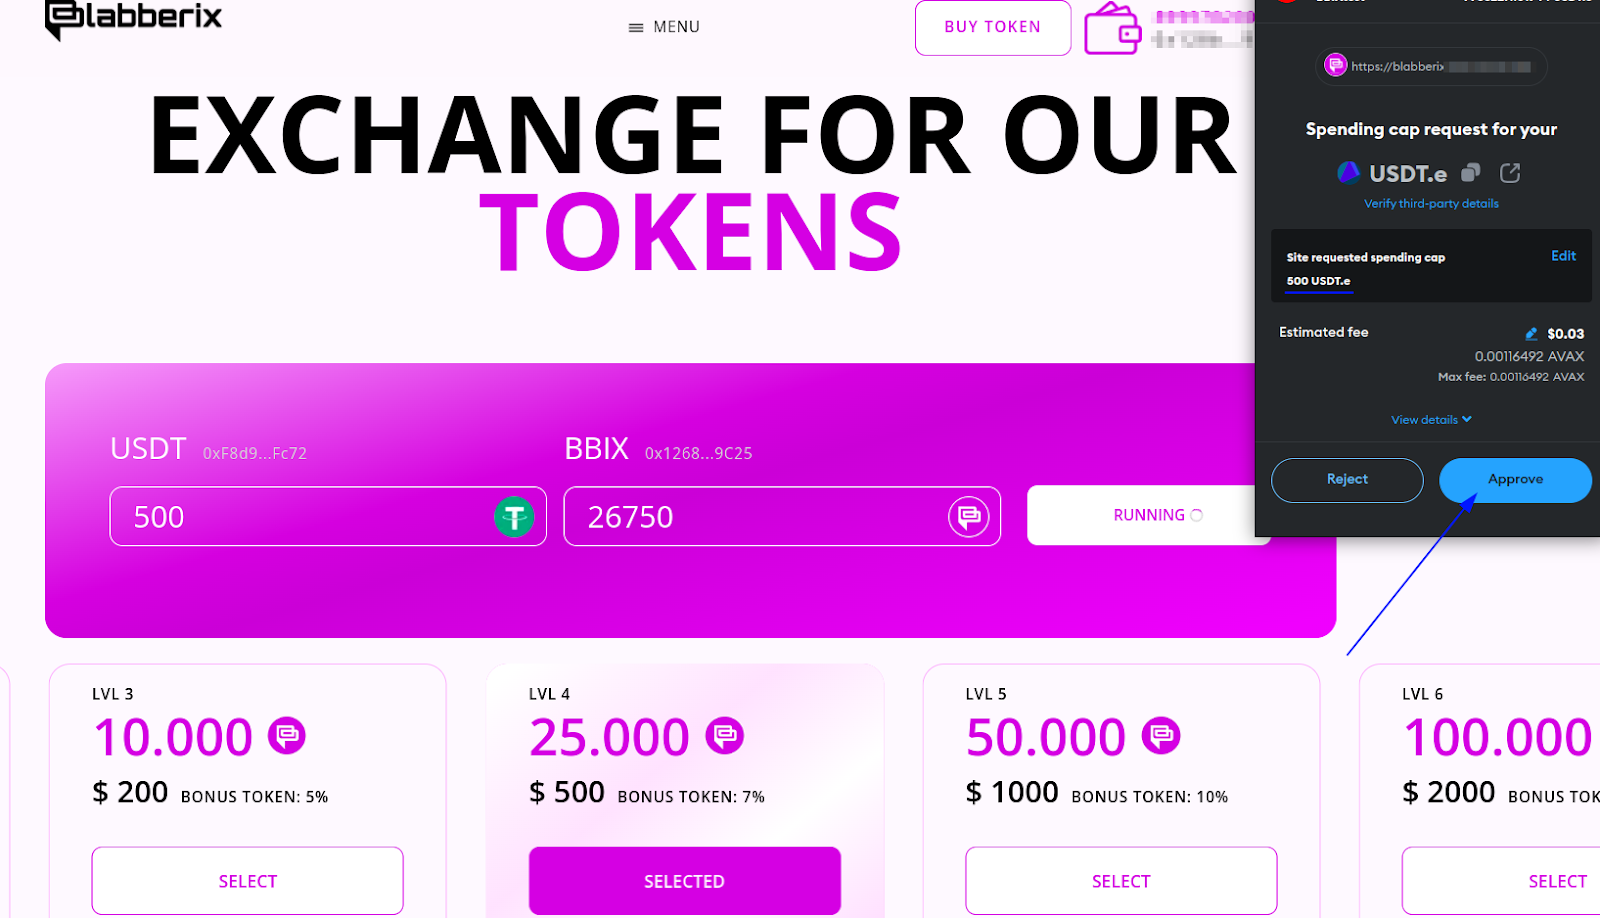
Fig. 8
As a result, you will receive a notification about the successful authorization to spend the amount of funds you have chosen (at this point, the funds have not yet been debited from your wallet, but simply given permission to debit them):
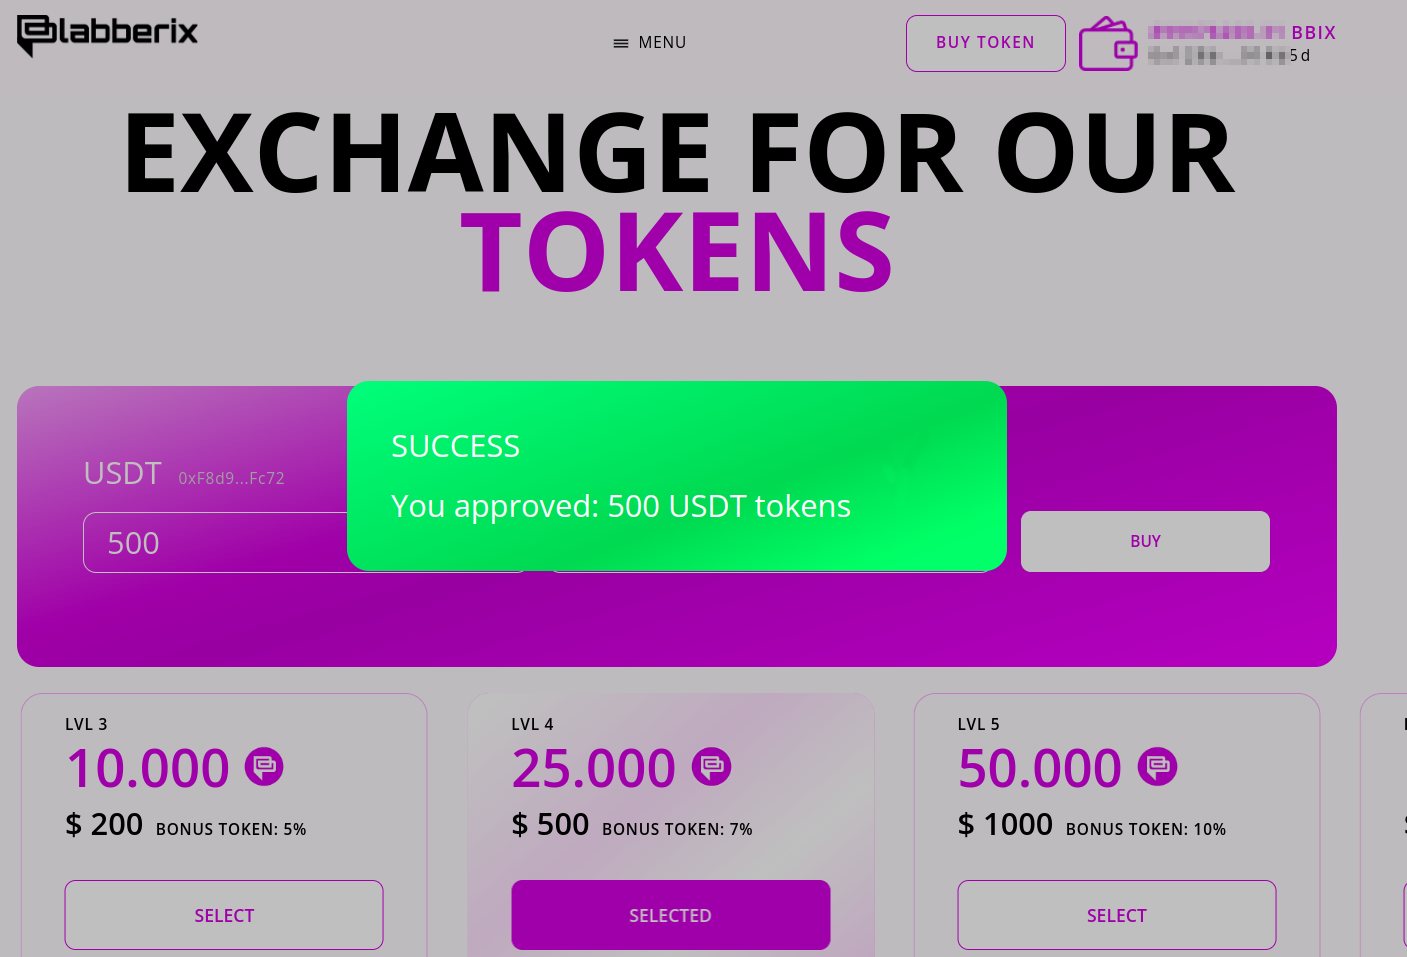
Fig. 9
Now you can make a purchase within the amount you previously approved:
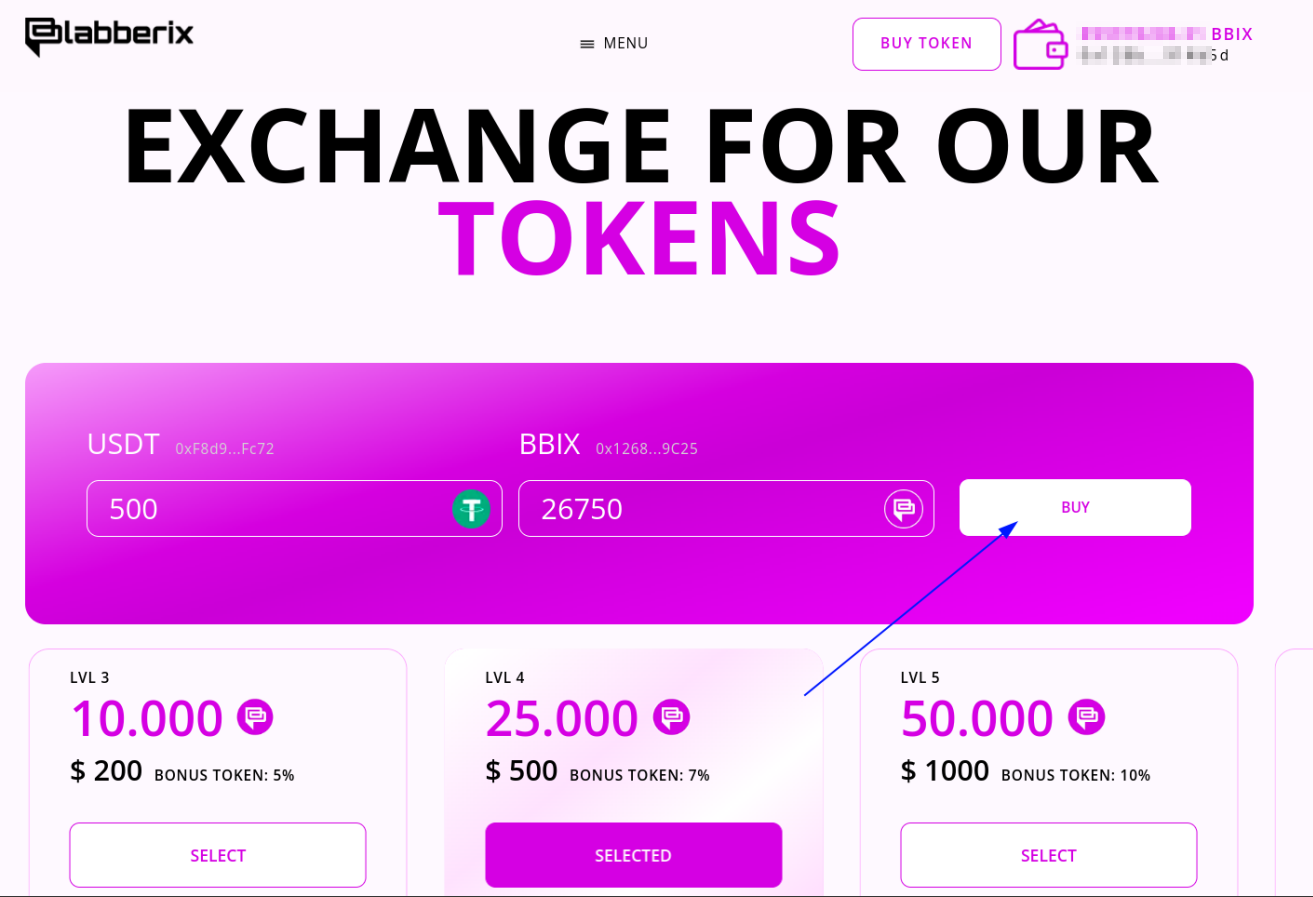
Fig. 10
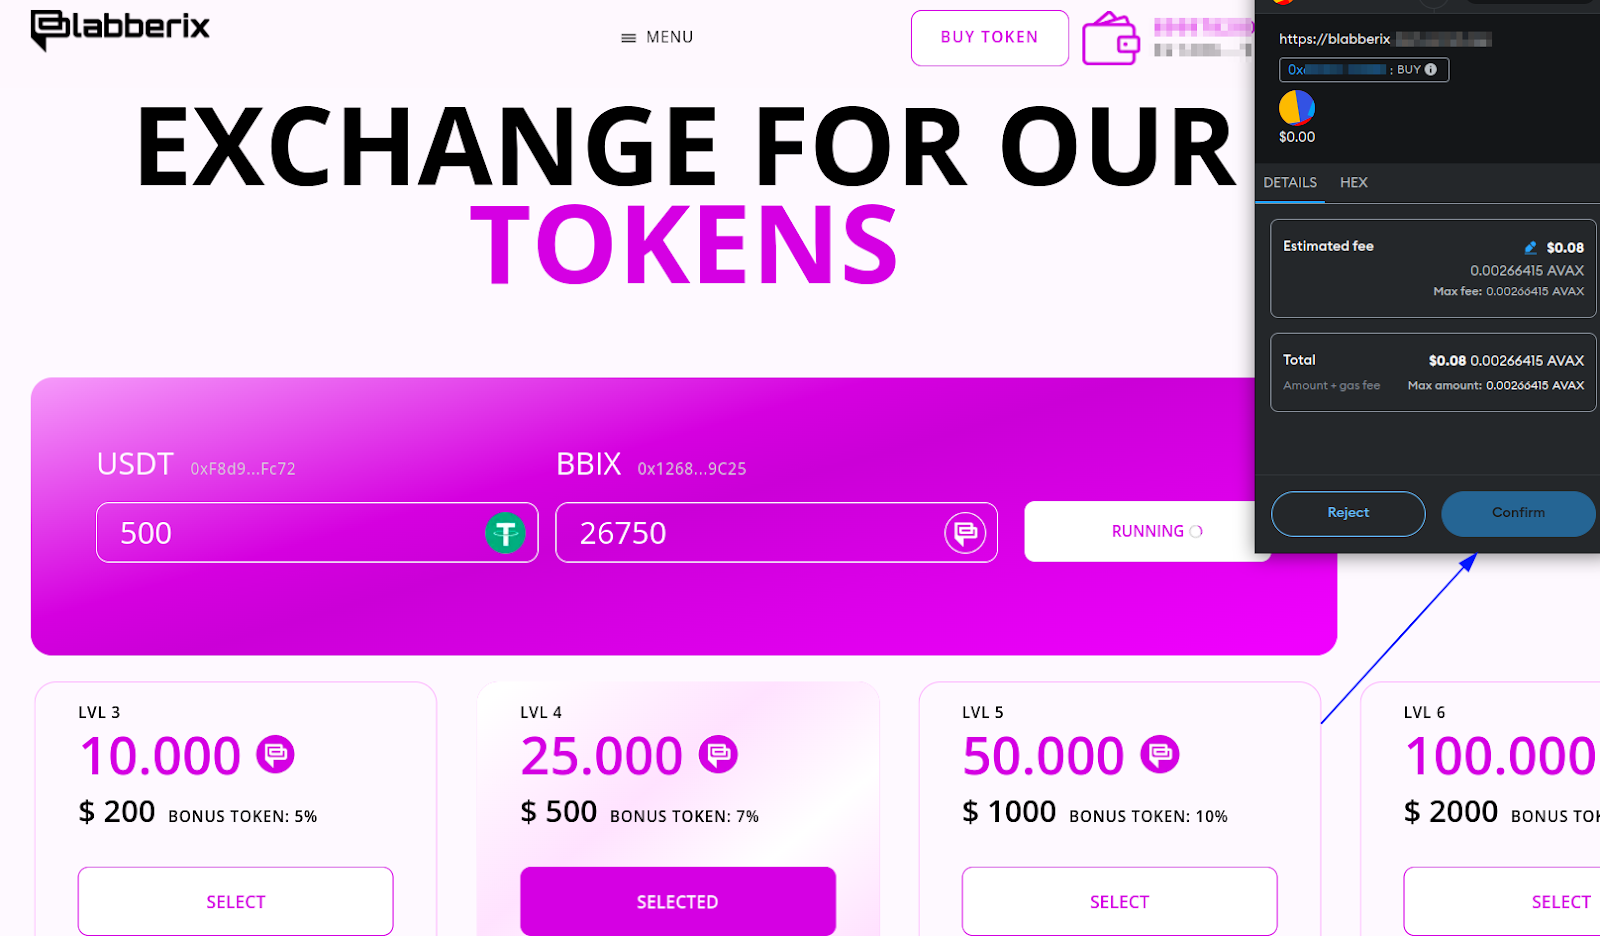
Fig. 11
After a successful purchase, you will receive congratulations and an offer to enter your contact details so that you can take advantage of all the benefits available to you:
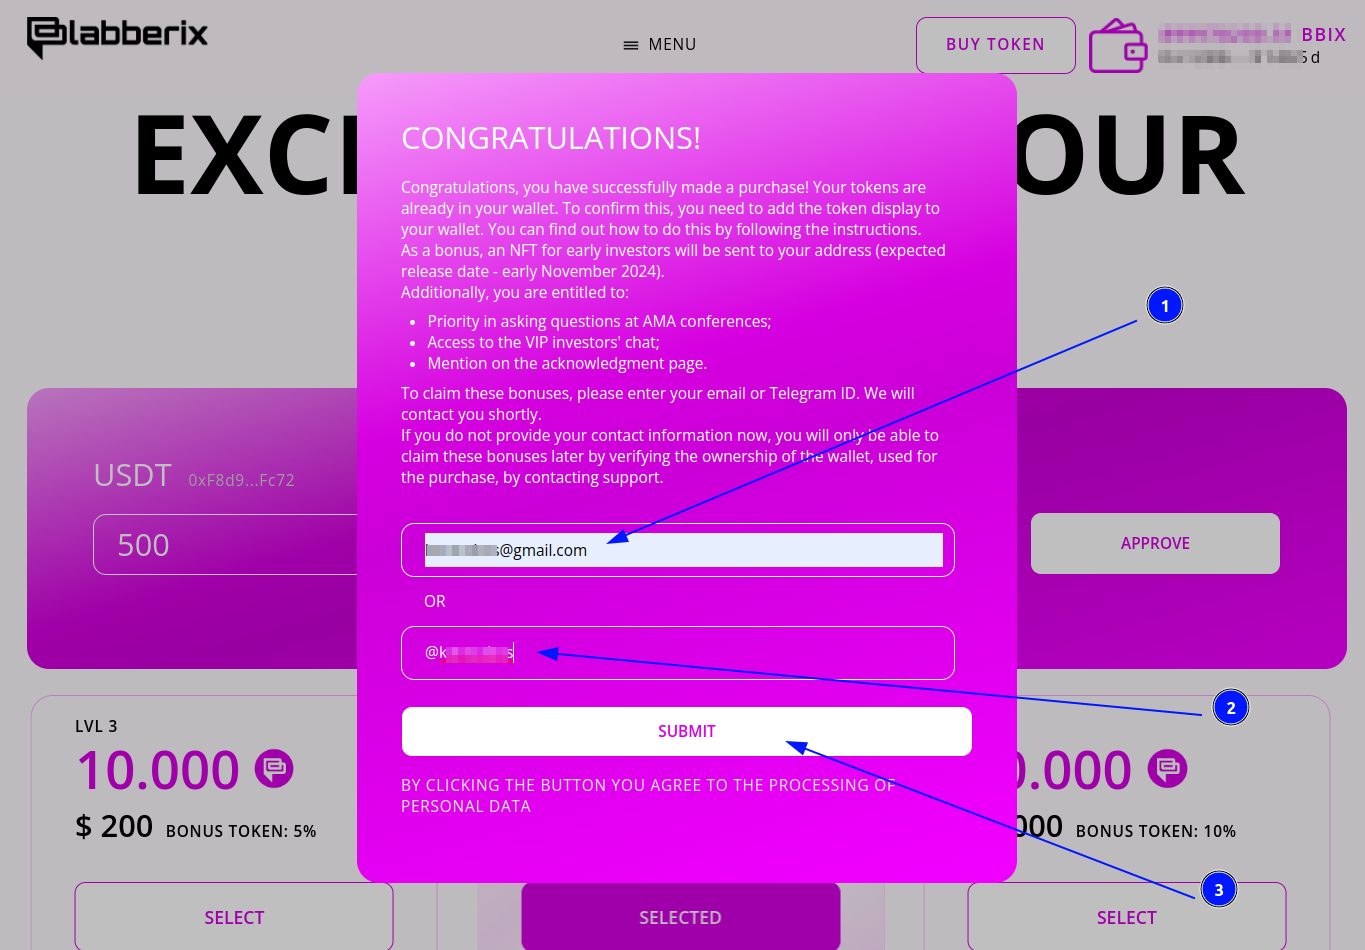
Fig. 12
Displaying the BBIX token in the wallet
After purchasing tokens in some wallets, such as Core.app, they will be displayed in your wallet automatically, and in some you need to add the address of the token contract manually to display them.
The address of the BBIX token contract: 0xabc72Ea2cF6d52D438619C653Ff9AE6c8ea07AFa
To display the BBIX token, depending on which wallet you use, follow these steps.
MetaMask
- Open the MetaMask app on your device (or an extension in the browser).
- Select the network to which the BBIX token is linked (Avalanche C-Chain).
- Click the "Tokens" button under the block displaying your balance and quick action icons.
- Scroll down and click the "Import token" button.
- In the "Custom token" section, enter the following information:
- Token contract address: 0xabc72Ea2cF6d52D438619C653Ff9AE6c8ea07AFa
- The remaining fields (the token symbol and the number of decimal places) will be filled in automatically.
- Click "Next".
- Make sure that you add BBIX tokens (and not others) and click the «Import» button.
The token will be added to your wallet.
Trust Wallet
- Open the Trust Wallet.
- Click on the icon in the upper right corner of the main page (search icon).
- Scroll down and select "Don’t see your crypto? Import".
- Enter the following information:
- Network: Select the network to which the token is linked (Avalanche C-chain).
- Token contract address: 0xabc72Ea2cF6d52D438619C653Ff9AE6c8ea07AFa
- The rest of the data (the character and the number of decimal places) are filled in automatically.
- Make sure that you add BBIX tokens (and not others) and click the «Import» button.
The token will be added to the list of assets.
Core.app
- Open the Core.app application.
- Go to the Tokens section.
A common case for other wallets
- Find the section for adding custom tokens in your wallet (it can be "Import token", "Add token" or "Custom token").
- Enter the token contract address: 0xabc72Ea2cF6d52D438619C653Ff9AE6c8ea07AFa
- Make sure that you have selected the correct network (Avalanche C-chain).
- The remaining fields, such as the token symbol and the number of decimal places, should be filled in automatically.
- Confirm the token addition.
These steps will allow you to display the token with this contract in any supported crypto wallet.